

| Labeling | Processing | Sample Description (Not built yet) |
| Labeling cans and bags |
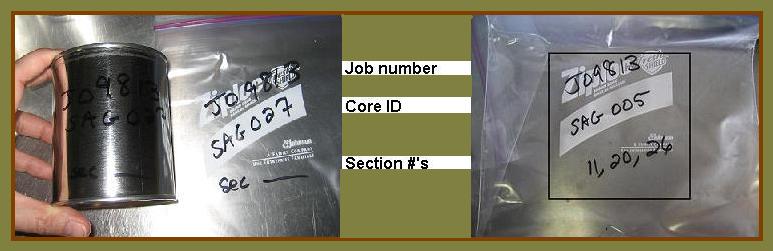
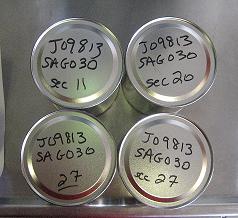
Labeling the cans and bags ahead of time will help you stay organized. Four steel cans and six quart bags will each be labeled with the job number, core ID and section number. Two gallon bags will each be labeled with the job number, core ID and the three section numbers that will be processed. You won't know the section number until you have measured the core, so that will be filled in later.
 Have your workspace ready. When you bring the sections into the lab, you should already have the cans, bags, spatula and extruder ready. Always do the sections in the same order - top to bottom. You are less likely to make mistakes if you follow the same order every time. 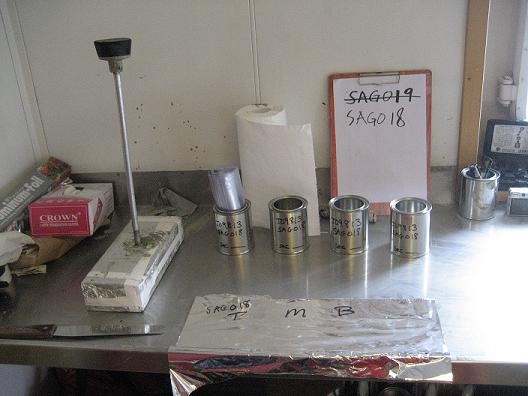 |
| Processing |
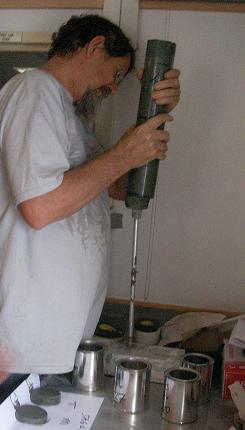 The next step is to extrude the mud into cans and bags. The chemical analysis performed on this sediment is highly sensitive. Every effort must be made not to contaminate the sample with any oil, grease or foreign matter. First, remove the top inch of sediment using a clean spatula and place it on a pre-labeled piece of paper or foil for later description. This step also removes any sediment that may have been contaminated during the cutting process. The remaining sediment will be divided roughly into thirds. 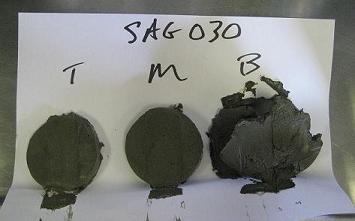 |
| Processing Bags |
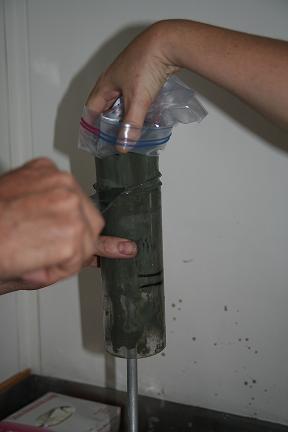 Next, remove the sediment for the bagged and canned samples. This will take two people- one to extrude the mud and another to "grab" it with the inverted quart bag. Next, remove the sediment for the bagged and canned samples. This will take two people- one to extrude the mud and another to "grab" it with the inverted quart bag.
Turning the bag inside out and using it as a glove is another step we take to prevent contamination of the sample. Try to avoid getting any in the "zipper". (If you do, wipe it off with a dry paper towel.) This will cause the bag to leak after it defrosts and may allow the sample to be contaminated during or after transport to the lab. Grab a little less than 1/3 of the sample and pull it back into the quart bag. Repeat this step with the next third of the sample and the remaining quart bag. Using a clean spatula, place the final third of the sample into the can. Repeat this process for each of the three sections. Mash the quart bags of sediment flat, removing excess air and keeping the sediment from getting in the zipper. Divide the bags into two complete sets - each having a top, middle and bottom sample. Place the first set into one of the labeled gallon bags and seal it. Place that gallon bag and the other three quart bags into the second gallon bag. Remove excess air and seal it. 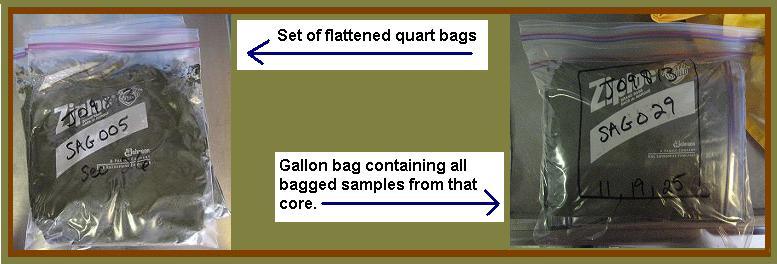 |
| Processing Cans |
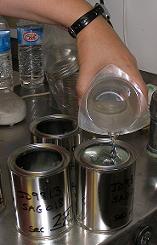 To process the cans, start by adding 160 ml of poisoned seawater to each can. Then clean the top of the can, especially the lid groove- with clean paper towels or Q-Tips. To process the cans, start by adding 160 ml of poisoned seawater to each can. Then clean the top of the can, especially the lid groove- with clean paper towels or Q-Tips. Place a lid loosely on each can. Turn the nitrogen gas on to a steady but not forceful flow. Insert the Nitrogen gas tube between the loose can and lid and count to ten to displace the ambient air. Remove the tube and place the lid firmly on top of the can. Repeat with each can. 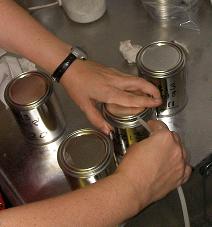
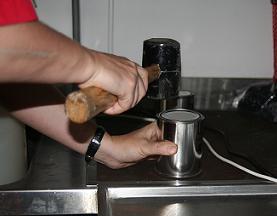
As soon as the last can is finished, use a rubber mallet to tap the lids on firmly. They will be frozen, stored and shipped upside down so it is important that the lid be completely sealed. |
| Samples to Freezer |
|
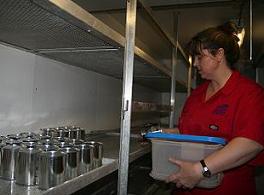
Finally, all cans and bags must be placed in the freezer. The cans need to be placed upside down. Take a moment to double check the labeling on the cans and bags. 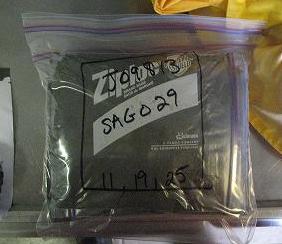
 |
| Sample Description |
| tba |